Monday, September 19, 2011

Project of September

This is YensRC latest project conducting in order to
improve model jet performance in anyway. Speed is
the objective of the study. Stability is behind the wing.
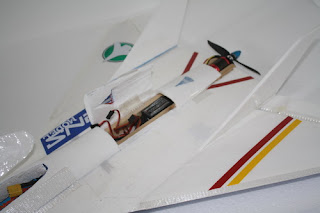
Its begining by reviewing the last Lightning jet. Considering a few factors, YensRC Work decide to use the same frame on this latest design. The new jet frame is highly upgrade to generate the constant laminar airflow air flow through jet body. Slightly in the end of jet frame is very thin structure from jet body to the wing tip. This improvement intend to minimise turbulence airflow which is generate huge drag force and furthermore effecting the speed of the aircraft.  The picture show some improvement to aerofoil design which is only 12mm on the wing shoulder and only 6mm thicness on
wing tip. (cont'd)



Monday, July 25, 2011

Malaysia Advance Variable Fighter


Evolution

New breed of delta wing jet with more updated features. Slim wing for crusing at high speed. Backward wing position for variable wing and more weight balance. High power output for speed. Thin wing to decrease drag force from surface friction.


The cont'd of this project is here:  http://www.duniarc.com/index.php/topic,9759.0.html

Thursday, April 28, 2011

YFV-0000Q

YFV-0000Q

My imagination gone wild again. The 5th generation fighter was developed for highly combat capability, air superiority, stealthty, and super manueverable. A few model such as F 22 Raptor, SU t50, and Chengdu J-20 are equipped with all cutting edge technology. So, i decide to built a conventinal fighter jet model with a combination of these optimize features. However, i narrowed down the scope of this research to flying characteristic and manueverability(i like the most).


Sunday, April 10, 2011

YensModel Jet

The v2 revealed...Successor design, proven performace, rigid flying characteristic.
This jet can go fast, very fast and super slow....


The first v2 was tested at Bintang(Terengganu) Motor Cross Track on Saturday 9/4/2011...


Saturday, March 26, 2011

yensrc: RC Jet

yensrc: RC Jet: "Step 6: Motors mount installation Marked a straight line from nose tip to the end of fuselage. Make sure its in the middle of fuselage by me..."

Wednesday, March 23, 2011

RC Jet

Step 7: Elactronic Parts Installation
In this section, all related parts such as ESC, Brushless Motor and Servos can be installed except Battery.
Picture below shows the setup;

RC Jet

Step 6: Motors mount installation
Marked a straight line from nose tip to the end of fuselage. Make sure its in the middle of fuselage by measuring each side and marked.


 Use epoxy for better bond. In my case, i used hot glue for fast bonding. Line up motor mount with the marked line and clip it to avoid any movement. Miss align motor mount can cause the jet spinning not flying.

RC Jet

Step 5: Fuselage Assemble
Carve the fuselage using sharp hobby knife for smooth surface. When overall shape carved, start sanding for desired shape. Sanding carefully to avoid over sanding and out of shape. Then assemble the main wing to the fuselage. Make it on flat surface for better connection.


Tuesday, March 22, 2011

RC Jet

Step 4: Main Wing and Flap
This part need very close attention. Both wing must be identical in size, aerofoil shape, flap size and hardened. Its can be cut using foam cutter with help of side aerofoil guide for constant shape. Sand the wing for smooth surface. Then protect the wing using tape and hardened using fibre rod also can used fibretape. After that, mark tha wing for flap and make bevel cut to separate wing and flap.


Wednesday, March 16, 2011

RC Jet

Step 3: Collecting material. For this jet, i used Ice  Box foam (EPS type). Cut the box into pieces and process it into square shape for ease of building.  Choose the foam for wing and main body.  Jet body must be made from thicker foam than main wing. Cut the plans and lay out on selected foam and glu it. Then cut out the foam.


Saturday, March 12, 2011

yensrc: RC Jet

yensrc: RC Jet: "Step 1: Resize the plans to the desired size. Then convert the plans into PDF file. It will help to tiled image for A4 size paper...."

RC Jet

Step 1: Resize the plans to the desired size. Then convert the plans into PDF file. It will help to tiled image for A4 size paper.


Step 2: Determine the type of power plant will be used. This part will effect the overall building process. For EDF version, jet body is totaly scale as plans. However, in building pusher prop jet, it will be much more easier because of the jet body does not require a thrust tube.Tthe less body thickness the better. It allows air flow induced by propeller at maximum capasity

Tuesday, March 8, 2011

RC Jet

This will be my first project post here. A step by step process will be share. Image post here can be copied and you guys can build it yourself. All the parts and accessories can be found in this blogspot directory...


Thursday, February 3, 2011

yensrc blog

Hi pilot!!! Welcome to yensrc blogspot. This blog is exclusive for RC hobbiest. I will share my aircraft project here. So, stay tune....

HD fpv Sunset Special

HD fpv "Sunset Special": https://youtu.be/baCLuW2Lozc